

How To Create Reaction Videos On Youtube
When you click the links and ads on this blog, it helps me to pay the bills & keep this site free for you. Thanks for supporting me! For more info, read the Disclosure page.
In this post, you will learnhow to make reaction videos for YouTube within 10 minutes. You will also get to know a few tips to avoid copyright claims on your reaction videos.
But before I begin, you already know the trend going on YouTube, where many people are giving reactions to different videos like movie trailers, short stories, music videos, etc.
As it is becoming popular day by day, many people would like to start their reaction channels. But the problem is, they do not know how it is made.
If you are too in the same boat, this guide will teach you how to make reaction videos in three ways. So, without wasting much time, let's get into the business.
What is Reaction Videos?
Basically, it is a video of an individual or group of people watching, and giving reactions to videos belonging to others. The videos can be anything from movie trailers, standup comedy, funny videos, vines, etc.
Benny Fine & Rafi Fine, better known for its YouTube channel Fine Brothers Entertainment (FBE), were the ones who made it famous.
As of now, YouTube has many reaction channels active, and day by day, more people want to start their own as it is simple to create.
So, not only can you ignore tons of editing like other videos, but you can easily make money as long as you are safe from copyright infringement.
How Do YouTubers Make Reaction Videos?
To be frank, it's not complicated as it looks. As a YouTuber, you just need good video editing software and a few other things to make such videos.
If you have all the things set-up, it will take a mere 10 minutes to create a reaction video that will be ready to get uploaded on YouTube.
Can You Make Money From Reaction Videos?
Yes, you can, but it is not an easy path.
The problem with reaction videos is they have a high chance of getting a copyright claim. If that happens, either the money generated from the video goes to the original creator, or you need to delete the video.
That is why a YouTuber must know the fair usage policy before creating such videos. The best thing they can do to play safe is sending an email to the original creator, asking for permission to react.
But then, they do not give permission to newbies as far as I know. If you have a good subscriber base with better views, the creators may provide their consent as it can give them good exposure.
So, a reaction video having the creator's approval is the best way to monetize and make money without worrying about copyright claims.
What Do You Need To Make Reaction Videos?
I am pretty sure most of the equipment is already available to you.
Though there is a chance, you won't have video editing software, but that's not a problem because you can easily find them online.
Here are the things you need to create reaction videos.
- Video camera or any good Smartphone camera
- Microphone for voice recording Or Earpiece with microphone
- A beautiful background (Optional)
- Videos to react
- Video editing software
- Background Music
1. Video Camera Or Smartphone
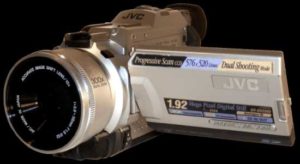
Obviously, without a video camera, how are you going to record yourself?
Though most people have them in their homes, many do not have access to them. In such a case, they can try these best cheap digital cameras.
If your smartphone can record in high-definition video mode, you can also use them instead.
2. Microphone For Audio Recording
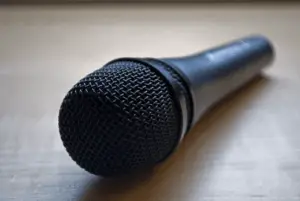
Recording your voice through your smartphone or camera mic can make your voice muddy, which is a big turnoff for your YouTube audience.
Therefore, I will suggest that you should invest a few bucks in an affordable microphone that can record your audio crisp & clear.
As an alternative, you can also use headphones having an in-built mic in them. Being a viewer, I would love to watch those reaction videos where I can clearly listen to the Youtuber's voice, or else I skip.
3. A Nice & Clean Place

Now it's not necessary, but if you want to look more professional, get a good background. It can be your nice looking room, green screen, or you can even use a curtain if your room is messy.
As a viewer, people get more attracted to those reaction videos which look more professional. Now, it doesn't mean others are bad, but the presentation matters.
4. Videos To React
It is up to you to decide which videos to react to. If you need some help, here are some suggestions – Movie trailers & fight scenes, stand-up comedy, funny videos & vines, speeches, video songs.
You must also listen to your audience in the comment section. I have seen several times people making a request to react to certain videos.
If you have time, check those comments and add repeatedly requested videos to your list. This way, not only are you going to make them happy, but you can also convert them into subscribers.
5. Video Editing Software
Many software is available online to edit videos, and all of them are great. However, I like Sony Vegas Pro 14 more because it is not only user-friendly but also beginner-friendly. I have used a bunch of software earlier, but I liked Vegas Pro more.
You can buy Vegas Pro 14 online if you're against piracy, or else you can get this software for free if you do some Google search.
6. Background Music
Though reaction videos don't need any background music, it is still a great idea to add light music while you are discussing the video.
Personally, I use TakeTones for downloading royalty-free music. Not only can I find fantastic sounds according to genre, mood, usage type, but the site is also pretty safe.
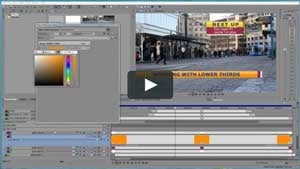
Steps To Create A Reaction Video Using Vegas Pro 14
I assume you have already recorded your reaction, and now you have two videos i.e, your reaction video and the one to whom you reacted.
Using Vegas Pro 14, it is time to edit them.
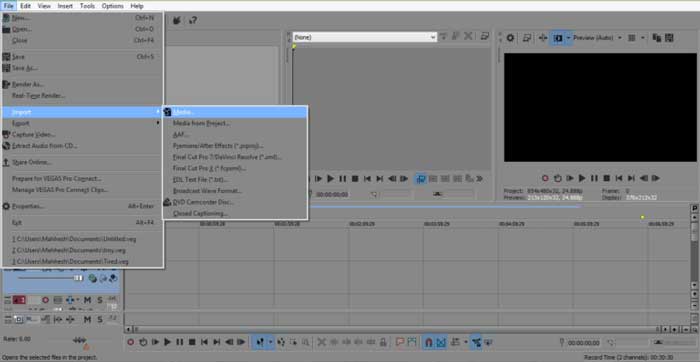
- Open Vegas Pro 14.
- File > Import > Media.
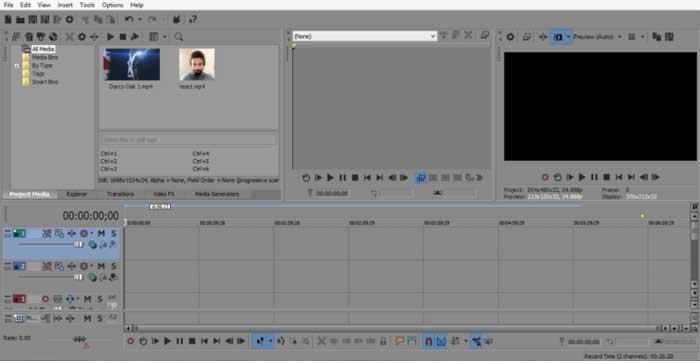
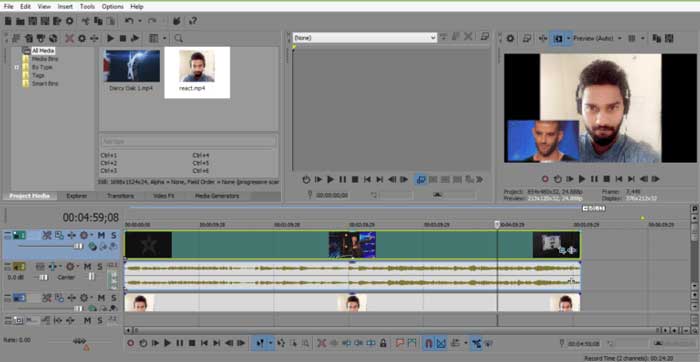
- I have imported two videos. Here Darcy Oak 1.mp4 is the video to whom I reacted & react.mp4 is my reaction video.
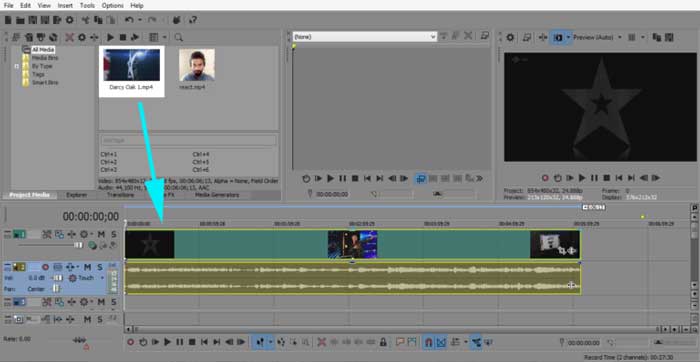
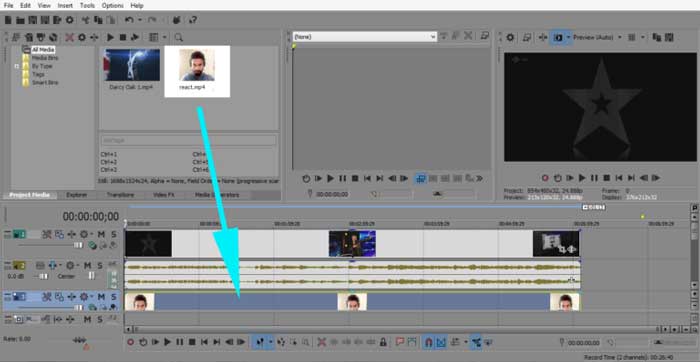
- Now drag both the videos into the timeline as shown. Remember to keep your reaction video at the bottom and the other one at the top.
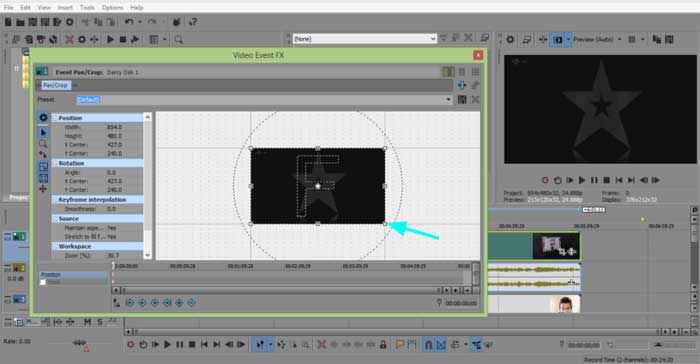
- Now select the top video (Darcy Oak 1.mp4) and click the Event Pan/Crop button as shown.

- A new window will popup. Here, change the preset to a 16:9 ratio & then resize the video box. For resizing, click & drag the small square (see the arrow in the screenshot) as if you want to enlarge it. This action will make the video screen smaller and, then you can adjust the size as per your convenience. Once you're done, drag the screen at the bottom or at the side.
- Now, you need to match both your videos in the timeline, so it plays perfectly in sync. To do so, you can drag both the videos on the timeline using the mouse cursor.
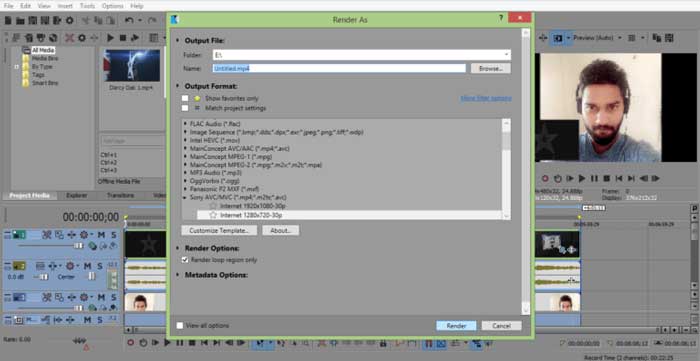
- Once both are in sync, play the video to see whether everything is working fine. If it is, save your file either in 720p or 1080p by clicking the Render As option. (File > Render As)
You have finally created your very own reaction video. Congratulations!
How To Make Reaction Videos Using Wondershare Filmora 10?
Wondershare Filmora's reaction video creation process is straightforward. Unlike the previous method, which required you to align both videos on the timeline, Filmora does not require you to do so.
Here's the entire procedure, complete with screenshots of each step.
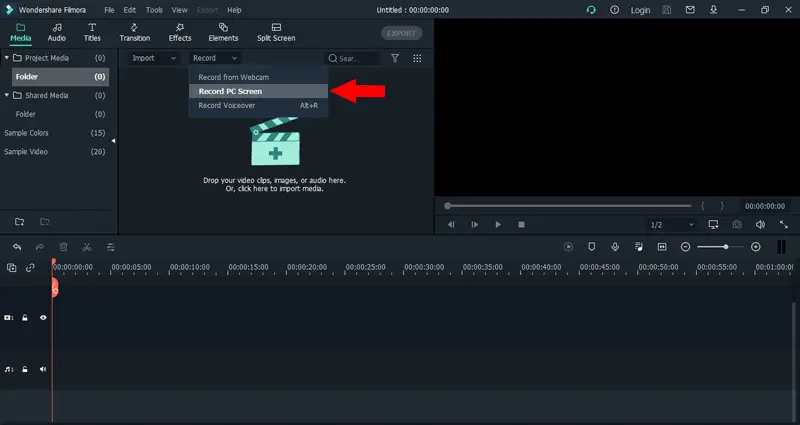
- Open your Wondershare Filmora software.
- Select the "Record PC Screen" option from the "Record" drop down menu.
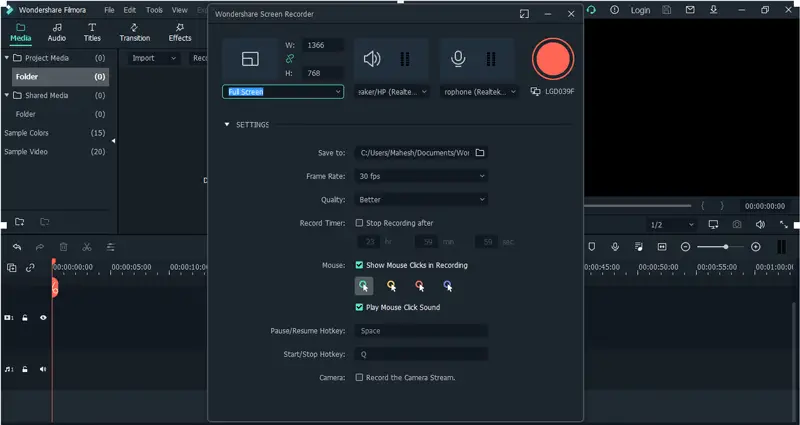
- You will see a box labeled "Wondershare Screen Recorder" with three sections. Choose full screen for the first section, computer/laptop speaker for the second, and microphone for the third. Pick the option in the second and third sections that are active.

- Then, just beneath it, click the settings option to expand the box. Here, you can configure the frame rate, video quality, and the pause/resume and start/stop buttons.
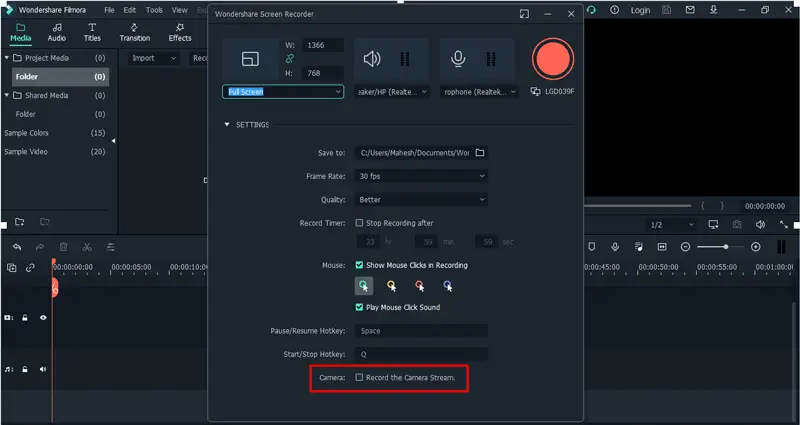
- Now, in the camera option, check the "Record the camera stream" box.
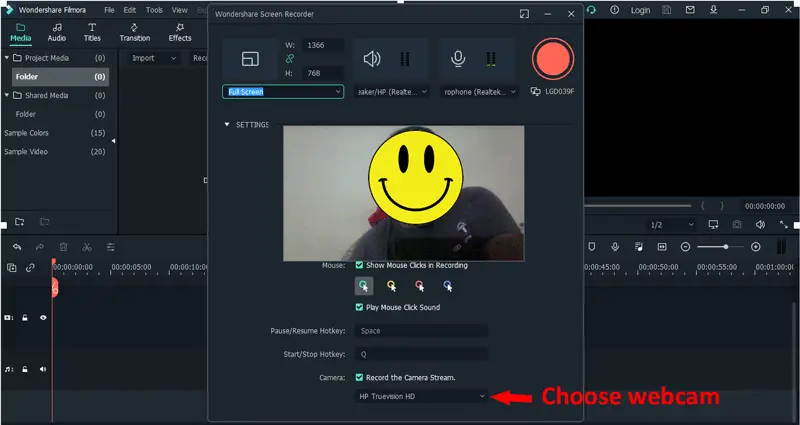
- You will see a webcam box as soon as you select it. If you have a separate webcam, you can select it from the drop down menu.
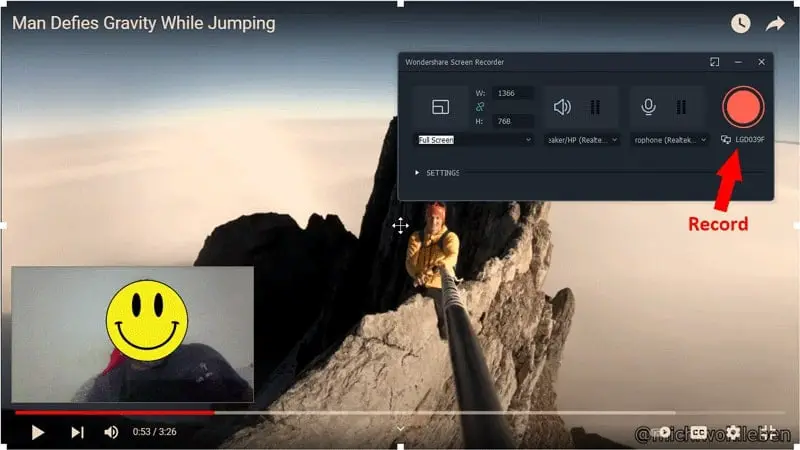
- Now, open any YouTube video on whom you want to react and make it full screen.
- Adjust the size of the webcam box to your liking and place it wherever you like. It is best to put it in the bottom-right or bottom-left corner. Then, click the record button to start recording.
- You will see a countdown to three and the screen recorder box will disappear from the screen.
Now, watch the video and give your honest reaction. If you want to say something in between, simply pause your YouTube video and express your thoughts.
When you're finished, simply press the keyboard key that you've assigned for the stop option to stop recording. Your reaction video will be saved in the following directory.
Documents>Wondershare>Wondershare Filmora>Output
You'll also notice that the same video has been added to Filmora. So, simply drag the video into the timeline and edit it to your liking.
How To Make Reaction Videos For Free?
Here is a step-by-step video from the YouTube channel CroatCode where he explains how you can create your own reaction video without spending any penny. Have a look.
How To Avoid Copyright Claim On YouTube?
If you are using someone's video, you may get a copyright claim for using the content without their permission. Mainly while reacting to music videos.
Keeping that in mind, the tricks I am sharing here aren't a 100% solution but still work. It will reduce the risk of getting copyright claims & who knows, your reaction videos can come out clean.
Here are six tricks I am talking about.
- A lot of YouTubers decrease the volume of the videos while reacting. They do this to avoid any audio detection by the YouTube bots. Thus, saving it from any claim.
- The second trick is to chop or skip 5 seconds of the video after every 30 seconds. This means you watch the first 30 seconds, skip the next 5 seconds, then again watch 30 seconds & skip the next 5 seconds, and so on.
- Instead of chopping out the 5 seconds, you can also pause the video after 30 seconds for a while and then replay it. While you pause the video, talk about it for a few seconds to have a gap between every 30 seconds.
- You can also email the YouTuber on whose video you are reacting to. While writing, gently asks them whether they are alright with the idea of a reaction video. If they are, the job is done. Else, try another video and repeat the same process.
- If you dislike the idea of asking permission, simply credit their channel and video in your video description. That might also work sometimes.
- Lastly, change the audio pitch of the video to make it sound a little different. This way YouTube may not able to detect any copyrighted material.
I know these tips may hamper the quality of the overall reaction video. But you must understand that you are using someone else content without their permission. So, it will always be risky.
The best thing you can do is get permission from them for a reaction. If the creator is really courteous, they will surely give their consent.

Conclusion
So, that's how youmake reaction videos & avoid copyright claims. Though there are several ways to create such videos, I find this method easier with Vegas Pro 14. If you still have any doubts, you can watch the video to see the process practically.
Read Next:
- CreateStudio Review – Create Stunning YouTube videos easily
- Grow your YouTube Channel With this Secret Tool
- 5 Websites to download Royalty-free music
Pin it For Later:
How To Create Reaction Videos On Youtube
Source: https://lifezeazy.com/make-reaction-videos/
Posted by: daviswallard1976.blogspot.com
0 Response to "How To Create Reaction Videos On Youtube"
Post a Comment